Strike Micro Threaded Comp - QUAD SI-MC-QUAD
13lb spring and SAR 128g brass FMJ
I have a HPE ProLiant DL20 Gen10 E-2224 1P 16GB-U S100i 2LFF 290W PS Server server setup with two 2.5" EVO SSD's, running pfSense in a mirrored zfs zpool. Hardware used for this build includes:
1. #P17079-B21 HPE ProLiant DL20 Gen10 E-2224 1P 16GB-U S100i 2LFF 290W PS Server
2. (2x) Samsung 860 EVO 250GB 2.5-Inch SATA III Internal SSD (MZ-76E250E)
3. (2x) #774026-001 G10 3.5 SAS/SATA HDD TRAY
4. (2x) DSLRKIT 2.5" SSD to 3.5" SATA HDD Adapter Caddy Tray CAGE Hot Swap Plug
The EVO drives and the 2.5" to 3.5" Adapter's are non HPE and purchased off Amazon. With this setup I am even able to hot swap drives in the array and repair without reboot or interruption of service. Drive lights work. Cooling profile is still valid.
The people at ZaynTek are the best. If you need any HPE Servers or server bolt ons they should be your first stop.
GRANT ALL PRIVILEGES ON test.* TO 'root'@'%' IDENTIFIED BY 'password';

FLUSH PRIVILEGES;
quit;<html>
<body>
<form action='cgi-bin/hello2.py' method='get'>
<label for="myname">Enter Your Name</label>
<input id="myname" type="text" name="firstname" value="Nada" />
<input type="submit">
</form>
</body>
</html>
get or post.submit renders as a button in the form. The purpose of this input type is to cause the form to be submitted back to the web server.#!/usr/bin/env python
import os
print "Content-type: text/html\n"
qs = os.environ['QUERY_STRING']
if 'firstname' in qs:
name = qs.split('=')[1]
else:
name = 'No Name Provided'
print "<html>"
print "<body>"
print "<h1>Hello %s</h1>" % name
print "</pre>"
print "</body>"
print "</html>"
QUERY_STRING environment variable contains the string firstname. Note that that firstname in the query string corresponds to the name attribute of the input element.?firstname=Sheldon&lastname=Cooper The ? separates the query string information from the URL itself. The & separates each name value pair.
#!/usr/bin/env python
import os

headers = ["Content-type: text/html"]
qs = os.environ['QUERY_STRING']

def sendHeaders():
    for h in headers:
        print h
    print "\n"

def sendForm():
    print '''
    <html>
      <body>
          <form action='cgi-bin/hellobetter.py' method='get'>
              <label for="myname">Enter Your Name</label>
              <input id="myname" type="text" name="firstname" value="Nada" />
              <input type="submit">
          </form>
      </body>
    </html>
    '''

def sendPage(name):
    print '''
    <html>
      <body>
        <h1>Hello {0}</h1>
      </body>
    </html>
    '''.format(name)

if not qs:
    sendHeaders()
    sendForm()
else:
    if 'firstname' in qs:
        name = qs.split('=')[1]
    else:
        name = 'No Name Provided'
    sendHeaders()
    sendPage(name)
sendPage and sendForm reduce the number of print statements we need by making use of Python’s triple quoted strings, and string formatting.sudo. Initial Setup Guide for CentOS 7 explains how to add users and give them sudo access.
- sudo yum check-update
- curl -fsSL https://get.docker.com/ | sh
- sudo systemctl start docker
- sudo systemctl status docker
Output
● docker.service - Docker Application Container Engine
   Loaded: loaded (/lib/systemd/system/docker.service; enabled; vendor preset: enabled)
   Active: active (running) since Sun 2016-05-01 06:53:52 CDT; 1 weeks 3 days ago
     Docs: https://docs.docker.com
 Main PID: 749 (docker)
- sudo systemctl enable docker
docker command line utility, or the Docker client. We'll explore how to use the docker command later in this tutorial.docker command requires root privileges — that is, you have to prefix the command with sudo. It can also be run by a user in the docker group, which is automatically created during the installation of Docker. If you attempt to run the docker command without prefixing it with sudo or without being in the docker group, you'll get an output like this:
Output
docker: Cannot connect to the Docker daemon. Is the docker daemon running on this host?.
See 'docker run --help'.
sudo whenever you run the docker command, add your username to the docker group:
- sudo usermod -aG docker $(whoami)
docker group that you're not logged in as, declare that username explicitly using:
- sudo usermod -aG docker username
docker command as a user in the docker user group. If you choose not to, please prepend the commands with sudo.docker consists of passing it a chain of options and subcommands followed by arguments. The syntax takes this form:
- docker [option] [command] [arguments]
- docker
Output
attach    Attach to a running container
    build     Build an image from a Dockerfile
    commit    Create a new image from a container's changes
    cp        Copy files/folders between a container and the local filesystem
    create    Create a new container
    diff      Inspect changes on a container's filesystem
    events    Get real time events from the server
    exec      Run a command in a running container
    export    Export a container's filesystem as a tar archive
    history   Show the history of an image
    images    List images
    import    Import the contents from a tarball to create a filesystem image
    info      Display system-wide information
    inspect   Return low-level information on a container or image
    kill      Kill a running container
    load      Load an image from a tar archive or STDIN
    login     Log in to a Docker registry
    logout    Log out from a Docker registry
    logs      Fetch the logs of a container
    network   Manage Docker networks
    pause     Pause all processes within a container
    port      List port mappings or a specific mapping for the CONTAINER
    ps        List containers
    pull      Pull an image or a repository from a registry
    push      Push an image or a repository to a registry
    rename    Rename a container
    restart   Restart a container
    rm        Remove one or more containers
    rmi       Remove one or more images
    run       Run a command in a new container
    save      Save one or more images to a tar archive
    search    Search the Docker Hub for images
    start     Start one or more stopped containers
    stats     Display a live stream of container(s) resource usage statistics
    stop      Stop a running container
    tag       Tag an image into a repository
    top       Display the running processes of a container
    unpause   Unpause all processes within a container
    update    Update configuration of one or more containers
    version   Show the Docker version information
    volume    Manage Docker volumes
    wait      Block until a container stops, then print its exit code
- docker docker-subcommand --help
- docker info
- docker run hello-world
Output
Hello from Docker.
This message shows that your installation appears to be working correctly.
...
docker command with the search subcommand. For example, to search for the CentOS image, type:
- docker search centos
Output
NAME                            DESCRIPTION                                     STARS     OFFICIAL   AUTOMATED
centos                          The official build of CentOS.                   2224      [OK]
jdeathe/centos-ssh              CentOS-6 6.7 x86_64 / CentOS-7 7.2.1511 x8...   22                   [OK]
jdeathe/centos-ssh-apache-php   CentOS-6 6.7 x86_64 / Apache / PHP / PHP M...   17                   [OK]
million12/centos-supervisor     Base CentOS-7 with supervisord launcher, h...   11                   [OK]
nimmis/java-centos              This is docker images of CentOS 7 with dif...   10                   [OK]
torusware/speedus-centos        Always updated official CentOS docker imag...   8                    [OK]
nickistre/centos-lamp           LAMP on centos setup                            3                    [OK]

...
pull subcommand, like so:
- docker pull centos
run subcommand. If an image has not been downloaded when docker is executed with the run subcommand, the Docker client will first download the image, then run a container using it:
- docker run centos
- docker images
[secondary_lable Output]
REPOSITORY          TAG                 IMAGE ID            CREATED             SIZE
centos              latest              778a53015523        5 weeks ago         196.7 MB
hello-world         latest              94df4f0ce8a4        2 weeks ago         967 B
hello-world container you ran in the previous step
is an example of a container that runs and exits, after emitting a test
message. Containers, however, can be much more useful than that, and
they can be interactive. After all, they are similar to virtual
machines, only more resource-friendly.
- docker run -it centos
Output
[root@59839a1b7de2 /]#
59839a1b7de2.sudo, because you're operating inside the container with root privileges:
- yum install mariadb-server
docker rm command, the changes will be lost for good.
- exit
- docker commit -m "What did you do to the image" -a "Author Name" container-id repository/new_image_name
- docker commit -m "added mariadb-server" -a "Sunday Ogwu-Chinuwa" 59839a1b7de2 finid/centos-mariadb
- docker images
Output
REPOSITORY             TAG                 IMAGE ID            CREATED             SIZE
finid/centos-mariadb   latest              23390430ec73        6 seconds ago       424.6 MB
centos                 latest              778a53015523        5 weeks ago         196.7 MB
hello-world            latest              94df4f0ce8a4        2 weeks ago         967 B
- docker ps
Output
CONTAINER ID        IMAGE               COMMAND             CREATED             STATUS              PORTS               NAMES
f7c79cc556dd        centos              "/bin/bash"         3 hours ago         Up 3 hours                              silly_spence
-a switch:
- docker ps -a
-l switch:
- docker ps -l
- docker stop container-id
container-id can be found in the output from the docker ps command.
- docker login -u docker-registry-username
- docker push docker-registry-username/docker-image-name
Output
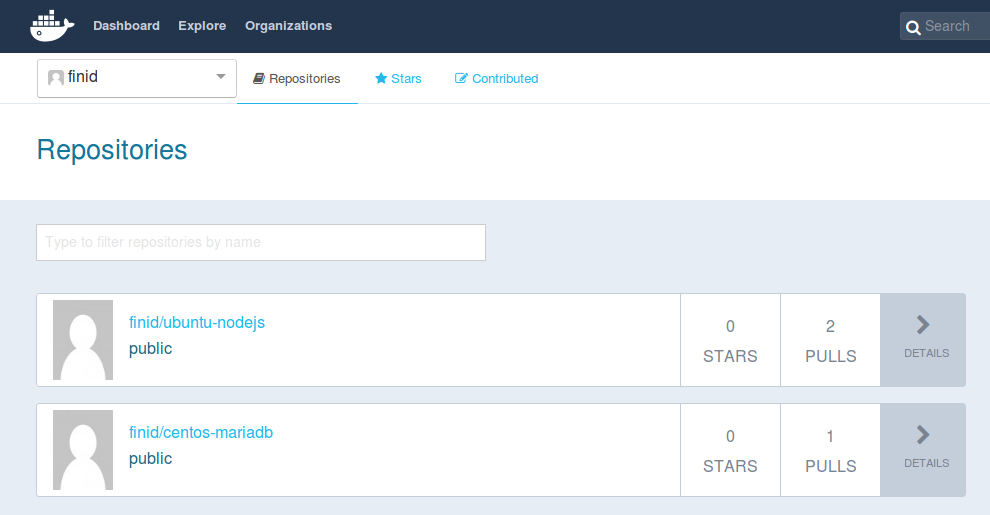
The push refers to a repository [docker.io/finid/centos-mariadb]
670194edfaf5: Pushed
5f70bf18a086: Mounted from library/centos
6a6c96337be1: Mounted from library/centos
...
Output
The push refers to a repository [docker.io/finid/centos-mariadb]
e3fbbfb44187: Preparing
5f70bf18a086: Preparing
a3b5c80a4eba: Preparing
7f18b442972b: Preparing
3ce512daaf78: Preparing
7aae4540b42d: Waiting
unauthorized: authentication required