CentOS 7 Install kernel 4.7 from elrepo or from scratch/compile
----------------------------------------------
Install from elrepo
** Always backup!
** Test this procedure on a vm test image if you can first.
Install private key.
rpm --import https://www.elrepo.org/RPM-GPG-KEY-elrepo.org
Install the repo.
rpm -Uvh http://www.elrepo.org/elrepo-release-7.0-2.el7.elrepo.noarch.rpm
Install supporting packages.
yum --enablerepo=elrepo-kernel yum install kernel-ml
reboot
uname -r
3.10.0-327.28.2.el7.x86_64
If you still your old kernel, like above with 3.10.0-327.28.2.el7.x86_64 then:
Change default menu entry
cat /boot/grub2/grub.cfg | grep menuentry
** or
cat /boot/efi/EFI/centos/grub.cfg | grep menuentry
And look for your 4.7 entry. My menu entry is the first one (or 0) so set it to that.
grub2-set-default 0
reboot
Now check version.
uname -r
4.7.0
Be sure and upgrade you btrfs-progs if you work with btrfs-progs
btrfs --version
btrfs-progs v3.19.1
Remove old btrfs-progs, if there, and install new.
yum -y remove btrfs-progs
yum -y install e2fs* libblk* zlib-* liblzo2* lz* asciidoc xmlto git wget
yum -y groupinstall "Development Tools"
cd /root
git clone git://git.kernel.org/pub/scm/linux/kernel/git/kdave/btrfs-progs.git
cd btrfs-progs
./autogen.sh
./configure && make
make install
reboot
btrfs --version
btrfs-progs v4.7
Install Stable 4.7 kernel from scratch/compile
** Always backup!
** Test this procedure on a vm test image if you can first.
yum -y groupinstall "Development Tools"
yum -y install gcc ncurses ncurses-devel wget bc libssl* openssl*
yum update
reboot
Log back into server.
cd /root
wget https://www.kernel.org/pub/linux/kernel/v4.x/linux-4.7.tar.xz
tar -xf linux-4.7.tar.xz -C /usr/src/
cd /usr/src/linux-4.7/
make menuconfig
save and exit.
Now make the kernel.
make
(or make oldconfig if you want to use your old kernel config)
Now install the kernel.
make modules_install install
reboot
and verify with:
uname -r
3.10.0-327.28.2.el7.x86_64
If you still your old kernel, like above with 3.10.0-327.28.2.el7.x86_64 then:
Change default menu entry
cat /boot/grub2/grub.cfg | grep menuentry
** or
cat /boot/efi/EFI/centos/grub.cfg | grep menuentry
And look for your 4.7 entry. My menu entry is the first one (or 0) so set it to that.
grub2-set-default 0
reboot
Now check version.
uname -r
4.7.0
Be sure and upgrade you btrfs-progs if you work with btrfs-progs
btrfs --version
btrfs-progs v3.19.1
Remove old btrfs-progs, if there, and install new.
yum -y remove btrfs-progs
yum -y install e2fs* libblk* zlib-* liblzo2* lz* asciidoc xmlto git wget
yum -y groupinstall "Development Tools"
cd /root
git clone git://git.kernel.org/pub/scm/linux/kernel/git/kdave/btrfs-progs.git
cd btrfs-progs
./autogen.sh
./configure && make
make install
reboot
btrfs --version
btrfs-progs v4.7
Saturday, August 13, 2016
Wednesday, August 10, 2016
Measure Disk IO, Latency, IOPS
Measure Disk IO, Latency, IOPS
I will be measuring this on my Btrfs pool mounted under /myraid
IOPS with FIO
cd /myraid
yum install -y make gcc libaio-devel || ( apt-get update && apt-get install -y make gcc libaio-dev </dev/null )
wget https://github.com/Crowd9/Benchmark/raw/master/fio-2.0.9.tar.gz ; tar xf fio*
cd fio*
make
Random read/write performance
./fio --randrepeat=1 --ioengine=libaio --direct=1 --gtod_reduce=1 --name=test --filename=test --bs=4k --iodepth=64 --size=4G --readwrite=randrw --rwmixread=75
test: (g=0): rw=randrw, bs=4K-4K/4K-4K, ioengine=libaio, iodepth=64
fio-2.0.9
Starting 1 process
test: Laying out IO file(s) (1 file(s) / 4096MB)
Jobs: 1 (f=1): [m] [100.0% done] [2716K/972K /s] [679 /243 iops] [eta 00m:00s]
test: (groupid=0, jobs=1): err= 0: pid=19383: Wed Aug 10 14:20:54 2016
read : io=3072.4MB, bw=4549.6KB/s, iops=1137 , runt=691524msec
write: io=1023.7MB, bw=1515.9KB/s, iops=378 , runt=691524msec
cpu : usr=1.45%, sys=11.65%, ctx=822425, majf=0, minf=3
IO depths : 1=0.1%, 2=0.1%, 4=0.1%, 8=0.1%, 16=0.1%, 32=0.1%, >=64=100.0%
submit : 0=0.0%, 4=100.0%, 8=0.0%, 16=0.0%, 32=0.0%, 64=0.0%, >=64=0.0%
complete : 0=0.0%, 4=100.0%, 8=0.0%, 16=0.0%, 32=0.0%, 64=0.1%, >=64=0.0%
issued : total=r=786524/w=262052/d=0, short=r=0/w=0/d=0
Run status group 0 (all jobs):
READ: io=3072.4MB, aggrb=4549KB/s, minb=4549KB/s, maxb=4549KB/s, mint=691524msec, maxt=691524msec
WRITE: io=1023.7MB, aggrb=1515KB/s, minb=1515KB/s, maxb=1515KB/s, mint=691524msec, maxt=691524msec
Random read performance
./fio --randrepeat=1 --ioengine=libaio --direct=1 --gtod_reduce=1 --name=test --filename=test --bs=4k --iodepth=64 --size=4G --readwrite=randread
Random write performance
./fio --randrepeat=1 --ioengine=libaio --direct=1 --gtod_reduce=1 --name=test --filename=test --bs=4k --iodepth=64 --size=4G --readwrite=randwrite
latency with IOPing
cd /myraid
yum install -y make gcc libaio-devel || ( apt-get update && apt-get install -y make gcc libaio-dev </dev/null )
wget https://ioping.googlecode.com/files/ioping-0.6.tar.gz ; tar xf ioping*
cd ioping*
make
./ioping -c 10 /myraid
4096 bytes from /myraid ( ): request=1 time=0.2 ms
4096 bytes from /myraid ( ): request=2 time=0.3 ms
4096 bytes from /myraid ( ): request=3 time=0.2 ms
4096 bytes from /myraid ( ): request=4 time=0.3 ms
4096 bytes from /myraid ( ): request=5 time=0.3 ms
4096 bytes from /myraid ( ): request=6 time=0.3 ms
4096 bytes from /myraid ( ): request=7 time=0.3 ms
4096 bytes from /myraid ( ): request=8 time=0.3 ms
4096 bytes from /myraid ( ): request=9 time=0.2 ms
4096 bytes from /myraid ( ): request=10 time=0.3 ms
Using dd
direct (use direct I/O for data)
dsync (use synchronized I/O for data)
sync (likewise, but also for metadata)
dd --help for more info
Using dd for throughput
dd if=/dev/zero of=/myraid/testfile bs=1G count=1 oflag=direct
1+0 records in
1+0 records out
1073741824 bytes (1.1 GB) copied, 2.03493 s, 528 MB/s
dd if=/dev/zero of=/myraid/testfile bs=1G count=1 oflag=dsync
1+0 records in
1+0 records out
1073741824 bytes (1.1 GB) copied, 2.30498 s, 466 MB/s
Using dd for latency
dd if=/dev/zero of=/myraid/testfile bs=512 count=1000 oflag=direct
1000+0 records in
1000+0 records out
512000 bytes (512 kB) copied, 0.260032 s, 2.0 MB/s
dd if=/dev/zero of=/myraid/testfile bs=512 count=1000 oflag=dsync
1000+0 records in
1000+0 records out
512000 bytes (512 kB) copied, 35.154 s, 14.6 kB/s
Tuesday, August 9, 2016
Centos 7 kernel upgrade via epl and brtfs-progs update
Centos 7 kernel upgrade via epl and brtfs-progs update
This has moved
http://glenewhittenberg.blogspot.com/2016/08/centos-7-install-kernel-47-from-elrepo.html
This has moved
http://glenewhittenberg.blogspot.com/2016/08/centos-7-install-kernel-47-from-elrepo.html
Monday, August 8, 2016
Centos 7 upgrade kernel to 4.7 and btrfs-progs to 4.7
Centos 7 upgrade kernel to 4.7 and btrfs-progs to 4.7
This has moved
http://glenewhittenberg.blogspot.com/2016/08/centos-7-install-kernel-47-from-elrepo.html
This has moved
http://glenewhittenberg.blogspot.com/2016/08/centos-7-install-kernel-47-from-elrepo.html
Sunday, August 7, 2016
ZFS vs Btrfs
ZFS vs Btrfs
So I could not get rid of my slow initial non cached reads on my 8 drive 4 vdev striped mirrors so I started researching other file systems and started looking at Btrfs. Although not as mature and full featured as ZFS yet, I thought what the heck. Its only a home lab and I make regular backups.
WOW. I am very happy so far. My initial non cached read wows are gone. I get reads and writes at 500MB+ across my 10Gb Ethernet DAC to/from PC/NAS. Here are a couple links that tell the story.
http://drdabbles.us/journal/2014/2/15/my-case-for-btrfs-over-zfs.html
https://events.linuxfoundation.org/sites/events/files/slides/Btrfs_1.pdf
https://www.diva-portal.org/smash/get/diva2:822493/FULLTEXT01.pdf
Bonnie++
Bonnie++
Stole this from https://www.jamescoyle.net/how-to/599-benchmark-disk-io-with-dd-and-bonnie
Thanks! :)
There are many commands which can be used with bonnie++, too many to cover here so let’s look at some of the common ones.
bonnie++ performs multiple tests, depending on the arguments used, and does not display much until the tests are complete. When the tests complete, two outputs are visible. The bottom line is not readable (unless you really know what you are doing) however above that is a table based output of the results of the tests performed.
Let’s start with a basic test, telling bonnie++ where to test and how much RAM is installed, 2GB in this example. bonnie++ will then use a dataset twice the size of the RAM for tests. As I am running as root, I am specifying a user name.
1
bonnie++ -d /tmp -r 2048 -u james
bonnie++ will take a few minutes, depending on the speed of your disks and return with something similar to the output below.
Using uid:1000, gid:1000.
Writing a byte at a time...done
Writing intelligently...done
Rewriting...done
Reading a byte at a time...done
Reading intelligently...done
start 'em...done...done...done...done...done...
Create files in sequential order...done.
Stat files in sequential order...done.
Delete files in sequential order...done.
Create files in random order...done.
Stat files in random order...done.
Delete files in random order...done.
Version 1.96 ------Sequential Output------ --Sequential Input- --Random-
Concurrency 1 -Per Chr- --Block-- -Rewrite- -Per Chr- --Block-- --Seeks--
Machine Size K/sec %CP K/sec %CP K/sec %CP K/sec %CP K/sec %CP /sec %CP
ubuntu 4G 786 99 17094 3 15431 3 4662 91 37881 4 548.4 17
Latency 16569us 15704ms 2485ms 51815us 491ms 261ms
Version 1.96 ------Sequential Create------ --------Random Create--------
ubuntu -Create-- --Read--- -Delete-- -Create-- --Read--- -Delete--
files /sec %CP /sec %CP /sec %CP /sec %CP /sec %CP /sec %CP
16 142 0 +++++ +++ +++++ +++ +++++ +++ +++++ +++ +++++ +++
Latency 291us 400us 710us 382us 42us 787us
1.96,1.96,ubuntu,1,1378913658,4G,,786,99,17094,3,15431,3,4662,91,37881,4,548.4,17,16,,,,,142,0,+++++,+++,+++++,+++,+++++,+++,+++++,+++,+++++,+++,16569us,15704ms,2485ms,51815us,491ms,261ms,291us,400us,710us,382us,42us,787us
The output shows quite a few statistics, but it’s actually quite straight forward once you understand the format. First, discard the bottom line (or three lines in the above output) as this is the results separated by a comma. Some scripts and graphing applications understand these results but it’s not so easy for humans. The top few lines are just the tests which bonnie++ performs and again, can be discarded.
Of cause, all the output of bonnie++ is useful in some context however we are just going to concentrate on random read/ write, reading a block and writing a block. This boils down to this section:
Version 1.96 ------Sequential Output------ --Sequential Input- --Random-
Concurrency 1 -Per Chr- --Block-- -Rewrite- -Per Chr- --Block-- --Seeks--
Machine Size K/sec %CP K/sec %CP K/sec %CP K/sec %CP K/sec %CP /sec %CP
ubuntu 4G 786 99 17094 3 15431 3 4662 91 37881 4 548.4 17
Latency 16569us 15704ms 2485ms 51815us 491ms 261ms
The above output is not the easiest output to understand due to the character spacing but you should be able to follow it, just. The below points are what we are interested in, for this example, and should give you a basic understanding of what to look for and why.
Anything showing multiple +++ is because the test could not be ran with reasonable assurance on the results because they completed too quickly. Increase -n to use more files in the operation and see the results.
bonnie++ can do much more and, even out of the box, show much more but this will give you some basic figures to understand and compare. Remember, always perform tests on datasets larger than the RAM you have installed, multiple times over the day, to reduce the chance of other processes interfering with the results.
Stole this from https://www.jamescoyle.net/how-to/599-benchmark-disk-io-with-dd-and-bonnie
Thanks! :)
There are many commands which can be used with bonnie++, too many to cover here so let’s look at some of the common ones.
- -d – is used to specify the file system directory to use to benchmark.
- -u – is used to run a a particular user. This is best used if you run the program as root. This is the UID or the name.
- -g – is used to run as a particular group. This is the GID or the name.
- -r – is used to specify the amount of RAM in MB the system has installed. This is total RAM, and not free RAM. Use free -m to find out how much RAM is on your system.
- -b – removes write buffering and performs a sync at the end of each bonnie++ operation.
- -s – specifies the dataset size to use for the IO test in MB.
- -n – is the number of files to use for the create files test.
- -m – this adds a label to the output so that you can understand what the test was at a later date.
- -x n – is used to repeat the tests n times. Change n to the number of how many times to run the tests.
bonnie++ performs multiple tests, depending on the arguments used, and does not display much until the tests are complete. When the tests complete, two outputs are visible. The bottom line is not readable (unless you really know what you are doing) however above that is a table based output of the results of the tests performed.
Let’s start with a basic test, telling bonnie++ where to test and how much RAM is installed, 2GB in this example. bonnie++ will then use a dataset twice the size of the RAM for tests. As I am running as root, I am specifying a user name.
1
bonnie++ -d /tmp -r 2048 -u james
bonnie++ will take a few minutes, depending on the speed of your disks and return with something similar to the output below.
Using uid:1000, gid:1000.
Writing a byte at a time...done
Writing intelligently...done
Rewriting...done
Reading a byte at a time...done
Reading intelligently...done
start 'em...done...done...done...done...done...
Create files in sequential order...done.
Stat files in sequential order...done.
Delete files in sequential order...done.
Create files in random order...done.
Stat files in random order...done.
Delete files in random order...done.
Version 1.96 ------Sequential Output------ --Sequential Input- --Random-
Concurrency 1 -Per Chr- --Block-- -Rewrite- -Per Chr- --Block-- --Seeks--
Machine Size K/sec %CP K/sec %CP K/sec %CP K/sec %CP K/sec %CP /sec %CP
ubuntu 4G 786 99 17094 3 15431 3 4662 91 37881 4 548.4 17
Latency 16569us 15704ms 2485ms 51815us 491ms 261ms
Version 1.96 ------Sequential Create------ --------Random Create--------
ubuntu -Create-- --Read--- -Delete-- -Create-- --Read--- -Delete--
files /sec %CP /sec %CP /sec %CP /sec %CP /sec %CP /sec %CP
16 142 0 +++++ +++ +++++ +++ +++++ +++ +++++ +++ +++++ +++
Latency 291us 400us 710us 382us 42us 787us
1.96,1.96,ubuntu,1,1378913658,4G,,786,99,17094,3,15431,3,4662,91,37881,4,548.4,17,16,,,,,142,0,+++++,+++,+++++,+++,+++++,+++,+++++,+++,+++++,+++,16569us,15704ms,2485ms,51815us,491ms,261ms,291us,400us,710us,382us,42us,787us
The output shows quite a few statistics, but it’s actually quite straight forward once you understand the format. First, discard the bottom line (or three lines in the above output) as this is the results separated by a comma. Some scripts and graphing applications understand these results but it’s not so easy for humans. The top few lines are just the tests which bonnie++ performs and again, can be discarded.
Of cause, all the output of bonnie++ is useful in some context however we are just going to concentrate on random read/ write, reading a block and writing a block. This boils down to this section:
Version 1.96 ------Sequential Output------ --Sequential Input- --Random-
Concurrency 1 -Per Chr- --Block-- -Rewrite- -Per Chr- --Block-- --Seeks--
Machine Size K/sec %CP K/sec %CP K/sec %CP K/sec %CP K/sec %CP /sec %CP
ubuntu 4G 786 99 17094 3 15431 3 4662 91 37881 4 548.4 17
Latency 16569us 15704ms 2485ms 51815us 491ms 261ms
The above output is not the easiest output to understand due to the character spacing but you should be able to follow it, just. The below points are what we are interested in, for this example, and should give you a basic understanding of what to look for and why.
- ubuntu is the machine name. If you specified -m some_test_info this would change to some_test_info.
- 4GB is the total size of the dataset. As we didn’t specify -s, a default of RAM x 2 is used.
- 17094 shows the speed in KB/s which the dataset was written. This, and the next three points are all sequential reads – that is reading more than one data block.
- 15431 is the speed at which a file is read and then written and flushed to the disk.
- 37881 is the speed the dataset is read.
- 548.4 shows the number of blocks which bonnie++ can seek to per second.
- Latency number correspond with the above operations – this is the full round-trip time it takes for bonnie++ to perform the operations.
Anything showing multiple +++ is because the test could not be ran with reasonable assurance on the results because they completed too quickly. Increase -n to use more files in the operation and see the results.
bonnie++ can do much more and, even out of the box, show much more but this will give you some basic figures to understand and compare. Remember, always perform tests on datasets larger than the RAM you have installed, multiple times over the day, to reduce the chance of other processes interfering with the results.
CentOS 7 build btrfs raid10
CentOS 7 build btrfs raid10
I have 8 3TB WD Red SATA drives for this array. sdb through sdi.
My boot and OS drive is a an 850 EVO SSD on sda.
The 8 WD drives are on a Supermicro AOC-SAS2LP-MV8 Add-on Card, 8-Channel SAS/SATA Adapter with 600MB/s per Channel in a PCIE x16 running at x8 on a Supermicro ATX DDR4 LGA 1151 C7Z170-OCE-O Motherboard with 64GB DDR4 RAM and a dual Intel Ethernet CNA using SFP+ DACs
Prepping drives for new partition by removing old stuff
NOTE** if you have drives from an array you will more than likely need to remove the super block from them.
wipefs -a /dev/sdb
wipefs -a /dev/sdc
wipefs -a /dev/sdd
wipefs -a /dev/sde
wipefs -a /dev/sdf
wipefs -a /dev/sdg
wipefs -a /dev/sdh
wipefs -a /dev/sdi
**END of NOTE
dd if=/dev/zero of=/dev/sdb bs=1024 count=1024
dd if=/dev/zero of=/dev/sdc bs=1024 count=1024
dd if=/dev/zero of=/dev/sdd bs=1024 count=1024
dd if=/dev/zero of=/dev/sde bs=1024 count=1024
dd if=/dev/zero of=/dev/sdf bs=1024 count=1024
dd if=/dev/zero of=/dev/sdg bs=1024 count=1024
dd if=/dev/zero of=/dev/sdh bs=1024 count=1024
dd if=/dev/zero of=/dev/sdi bs=1024 count=1024
reboot
ls -lsa /dev/sd*
0 brw-rw---- 1 root disk 8, 0 Aug 6 19:26 /dev/sda
0 brw-rw---- 1 root disk 8, 1 Aug 6 19:26 /dev/sda1
0 brw-rw---- 1 root disk 8, 2 Aug 6 19:26 /dev/sda2
0 brw-rw---- 1 root disk 8, 3 Aug 6 19:26 /dev/sda3
0 brw-rw---- 1 root disk 8, 16 Aug 6 19:26 /dev/sdb
0 brw-rw---- 1 root disk 8, 32 Aug 6 19:26 /dev/sdc
0 brw-rw---- 1 root disk 8, 48 Aug 6 19:26 /dev/sdd
0 brw-rw---- 1 root disk 8, 64 Aug 6 19:26 /dev/sde
0 brw-rw---- 1 root disk 8, 80 Aug 6 19:26 /dev/sdf
0 brw-rw---- 1 root disk 8, 96 Aug 6 19:26 /dev/sdg
0 brw-rw---- 1 root disk 8, 112 Aug 6 19:26 /dev/sdh
0 brw-rw---- 1 root disk 8, 128 Aug 6 19:26 /dev/sdi
Creating RAID array
[root@nas /]# mkfs.btrfs -f -m raid10 -d raid10 -L myraid /dev/sdb /dev/sdc /dev/sdd /dev/sde /dev/sdf /dev/sdg /dev/sdh /dev/sdi
btrfs-progs v3.19.1
See http://btrfs.wiki.kernel.org for more information.
Turning ON incompat feature 'extref': increased hardlink limit per file to 65536
Turning ON incompat feature 'skinny-metadata': reduced-size metadata extent refs
adding device /dev/sdc id 2
adding device /dev/sdd id 3
adding device /dev/sde id 4
adding device /dev/sdf id 5
adding device /dev/sdg id 6
adding device /dev/sdh id 7
adding device /dev/sdi id 8
fs created label myraid on /dev/sdb
nodesize 16384 leafsize 16384 sectorsize 4096 size 21.83TiB
Check filesystem
[root@nas ~]# btrfs filesystem show
Label: 'myraid' uuid: 1c556918-451a-4182-a2d7-f361e5177f30
Total devices 8 FS bytes used 5.55GiB
devid 1 size 2.73TiB used 3.02GiB path /dev/sdb
devid 2 size 2.73TiB used 3.00GiB path /dev/sdc
devid 3 size 2.73TiB used 3.00GiB path /dev/sdd
devid 4 size 2.73TiB used 3.00GiB path /dev/sde
devid 5 size 2.73TiB used 3.00GiB path /dev/sdf
devid 6 size 2.73TiB used 3.00GiB path /dev/sdg
devid 7 size 2.73TiB used 3.00GiB path /dev/sdh
devid 8 size 2.73TiB used 3.00GiB path /dev/sdi
[root@nas ~]# lsblk --output NAME,KNAME,SIZE,TYPE,MOUNTPOINT,LABEL,UUID,PARTLABEL,PARTUUID
NAME KNAME SIZE TYPE MOUNTPOINT LABEL UUID PARTLABEL PARTUUID
sda sda 119.2G disk
├─sda1 sda1 200M part /boot/efi D03D-8249 EFI System Partition
340a2110-2a4e-4632-aaf2-589c666a0e82
├─sda2 sda2 500M part /boot 1b85b52d-da28-49c0-a27a-ead6546c0229 47986551-0653-415d-aa8c-cdbe703ac889
└─sda3 sda3 118.6G part GPOH5s-Rj85-yNVT-hprF-0pg2-6cOC-DUDwnk 72d5c3be-8720-48ce-b9c5-5864b49c812c
├─centos_nas-swap
dm-0 11.9G lvm [SWAP] 08f5d728-5412-4693-8ce7-1bfcddfa098f
├─centos_nas-root
dm-1 50G lvm / 81ccf919-f113-41a7-85f6-14dd838999bf
└─centos_nas-home
dm-2 56.6G lvm /home b7577e12-c4f5-46e9-8498-490744cf0da1
sdb sdb 2.7T disk /myraid myraid 1c556918-451a-4182-a2d7-f361e5177f30
sdc sdc 2.7T disk myraid 1c556918-451a-4182-a2d7-f361e5177f30
sdd sdd 2.7T disk myraid 1c556918-451a-4182-a2d7-f361e5177f30
sde sde 2.7T disk myraid 1c556918-451a-4182-a2d7-f361e5177f30
sdf sdf 2.7T disk myraid 1c556918-451a-4182-a2d7-f361e5177f30
sdg sdg 2.7T disk myraid 1c556918-451a-4182-a2d7-f361e5177f30
sdh sdh 2.7T disk myraid 1c556918-451a-4182-a2d7-f361e5177f30
sdi sdi 2.7T disk myraid 1c556918-451a-4182-a2d7-f361e5177f30
Mount Array
mkdir /myraid
mount /dev/sdb /myraid
Persistent mount on reboot
Use the UUID from the "btrfs filesystem show" above
vi /etc/fstab
UUID=1c556918-451a-4182-a2d7-f361e5177f30 /myraid btrfs defaults,compress=lzo,autodefrag,x-systemd.device-timeout=0 0 0
Check for fstab errors
mount -av
reboot
Make sure you have a mount
[root@nas myraid]# df -h
Filesystem Size Used Avail Use% Mounted on
/dev/mapper/centos_nas-root 50G 4.8G 46G 10% /
devtmpfs 32G 0 32G 0% /dev
tmpfs 32G 4.0K 32G 1% /dev/shm
tmpfs 32G 8.9M 32G 1% /run
tmpfs 32G 0 32G 0% /sys/fs/cgroup
/dev/sda2 497M 301M 197M 61% /boot
/dev/sda1 200M 9.5M 191M 5% /boot/efi
/dev/sdb 11T 5.6G 11T 1% /myraid
/dev/mapper/centos_nas-home 57G 2.0G 55G 4% /home
tmpfs 6.3G 0 6.3G 0% /run/user/0
[root@nas myraid]# mount -av
/ : ignored
/boot : already mounted
/boot/efi : already mounted
/home : already mounted
swap : ignored
mount: /dev/sdc is already mounted or /myraid busy
Saturday, August 6, 2016
CentOS 7 build mdadm raid10 or raid0
CentOS 7 build mdadm raid10 or raid0
I have 8 3TB WD Red SATA drives for this array. sdb through sdi.
My boot and OS drive is a an 850 EVO SSD on sda.
The 8 WD drives are on a Supermicro AOC-SAS2LP-MV8 Add-on Card, 8-Channel SAS/SATA Adapter with 600MB/s per Channel in a PCIE x16 running at x8 on a Supermicro ATX DDR4 LGA 1151 C7Z170-OCE-O Motherboard
Prepping drives for new partion by removeing old stuff
NOTE** If you have drives from an array you will more than likely need to remove the super block from them.
NOTE** mdadm must be installed to remove superblock.
mdadm --stop /dev/md0
mdadm --zero-superblock /dev/sdb1
mdadm --zero-superblock /dev/sdc1
mdadm --zero-superblock /dev/sdd1
mdadm --zero-superblock /dev/sde1
mdadm --zero-superblock /dev/sdf1
mdadm --zero-superblock /dev/sdg1
mdadm --zero-superblock /dev/sdh1
mdadm --zero-superblock /dev/sdi1
wipefs -a /dev/sdb
wipefs -a /dev/sdc
wipefs -a /dev/sdd
wipefs -a /dev/sde
wipefs -a /dev/sdf
wipefs -a /dev/sdg
wipefs -a /dev/sdh
wipefs -a /dev/sdi
**END of NOTE
dd if=/dev/zero of=/dev/sdb bs=1024 count=1024
dd if=/dev/zero of=/dev/sdc bs=1024 count=1024
dd if=/dev/zero of=/dev/sdd bs=1024 count=1024
dd if=/dev/zero of=/dev/sde bs=1024 count=1024
dd if=/dev/zero of=/dev/sdf bs=1024 count=1024
dd if=/dev/zero of=/dev/sdg bs=1024 count=1024
dd if=/dev/zero of=/dev/sdh bs=1024 count=1024
dd if=/dev/zero of=/dev/sdi bs=1024 count=1024
reboot
ls -lsa /dev/sd*
0 brw-rw---- 1 root disk 8, 0 Aug 6 19:26 /dev/sda
0 brw-rw---- 1 root disk 8, 1 Aug 6 19:26 /dev/sda1
0 brw-rw---- 1 root disk 8, 2 Aug 6 19:26 /dev/sda2
0 brw-rw---- 1 root disk 8, 3 Aug 6 19:26 /dev/sda3
0 brw-rw---- 1 root disk 8, 16 Aug 6 19:26 /dev/sdb
0 brw-rw---- 1 root disk 8, 32 Aug 6 19:26 /dev/sdc
0 brw-rw---- 1 root disk 8, 48 Aug 6 19:26 /dev/sdd
0 brw-rw---- 1 root disk 8, 64 Aug 6 19:26 /dev/sde
0 brw-rw---- 1 root disk 8, 80 Aug 6 19:26 /dev/sdf
0 brw-rw---- 1 root disk 8, 96 Aug 6 19:26 /dev/sdg
0 brw-rw---- 1 root disk 8, 112 Aug 6 19:26 /dev/sdh
0 brw-rw---- 1 root disk 8, 128 Aug 6 19:26 /dev/sdi
fdisk -l should show non partion drives for sdb through sdi
Installing mdadm
yum clean all && yum update
Verify Attached Drives
ls -l /dev | grep sd
mdadm --examine /dev/sd[b-i]
Creating Partitions for RAID. Do this for all 8 drives
parted /dev/sdb
mklabel gpt
yes
unit TB
mkpart primary 0.00TB 3.00TB
print
quit
[root@nas ~]# ls -lsa /dev/sd*
0 brw-rw---- 1 root disk 8, 0 Aug 6 19:26 /dev/sda
0 brw-rw---- 1 root disk 8, 1 Aug 6 19:26 /dev/sda1
0 brw-rw---- 1 root disk 8, 2 Aug 6 19:26 /dev/sda2
0 brw-rw---- 1 root disk 8, 3 Aug 6 19:26 /dev/sda3
0 brw-rw---- 1 root disk 8, 16 Aug 6 19:35 /dev/sdb
0 brw-rw---- 1 root disk 8, 17 Aug 6 19:35 /dev/sdb1
0 brw-rw---- 1 root disk 8, 32 Aug 6 19:36 /dev/sdc
0 brw-rw---- 1 root disk 8, 33 Aug 6 19:36 /dev/sdc1
0 brw-rw---- 1 root disk 8, 48 Aug 6 19:37 /dev/sdd
0 brw-rw---- 1 root disk 8, 49 Aug 6 19:37 /dev/sdd1
0 brw-rw---- 1 root disk 8, 64 Aug 6 19:37 /dev/sde
0 brw-rw---- 1 root disk 8, 65 Aug 6 19:37 /dev/sde1
0 brw-rw---- 1 root disk 8, 80 Aug 6 19:37 /dev/sdf
0 brw-rw---- 1 root disk 8, 81 Aug 6 19:37 /dev/sdf1
0 brw-rw---- 1 root disk 8, 96 Aug 6 19:37 /dev/sdg
0 brw-rw---- 1 root disk 8, 97 Aug 6 19:37 /dev/sdg1
0 brw-rw---- 1 root disk 8, 112 Aug 6 19:37 /dev/sdh
0 brw-rw---- 1 root disk 8, 113 Aug 6 19:37 /dev/sdh1
0 brw-rw---- 1 root disk 8, 128 Aug 6 19:37 /dev/sdi
0 brw-rw---- 1 root disk 8, 129 Aug 6 19:37 /dev/sdi1
Exzamine drives
mdadm --examine /dev/sd[b-i]
mdadm --examine /dev/sd[b-i]1
Creating RAID array
mdadm --create /dev/md0 --level raid10 --raid-disks 8 /dev/sd[b-i]1
****NOTE use "--level=stripe" for raid0
Exzamine Array
cat /proc/mdstat
mdadm -E /dev/sd[b-i]1
mdadm --detail /dev/md0
Create file system
mkfs.ext4 /dev/md0
Mount Array
mkdir /myraid
mount /dev/md0 /myraid
Persistent mount on reboot
vi /etc/fstab
/dev/md0 /myraid ext4 defaults 0 0
Check for fstab errors
mount -av
Saving RAID Configuration
mdadm -E -s -v >> /etc/mdadm.conf
mdadm --detail --scan --verbose >> /etc/mdadm.conf
cat /etc/mdadm.conf
I have 8 3TB WD Red SATA drives for this array. sdb through sdi.
My boot and OS drive is a an 850 EVO SSD on sda.
The 8 WD drives are on a Supermicro AOC-SAS2LP-MV8 Add-on Card, 8-Channel SAS/SATA Adapter with 600MB/s per Channel in a PCIE x16 running at x8 on a Supermicro ATX DDR4 LGA 1151 C7Z170-OCE-O Motherboard
Prepping drives for new partion by removeing old stuff
NOTE** If you have drives from an array you will more than likely need to remove the super block from them.
NOTE** mdadm must be installed to remove superblock.
mdadm --stop /dev/md0
mdadm --zero-superblock /dev/sdb1
mdadm --zero-superblock /dev/sdc1
mdadm --zero-superblock /dev/sdd1
mdadm --zero-superblock /dev/sde1
mdadm --zero-superblock /dev/sdf1
mdadm --zero-superblock /dev/sdg1
mdadm --zero-superblock /dev/sdh1
mdadm --zero-superblock /dev/sdi1
wipefs -a /dev/sdb
wipefs -a /dev/sdc
wipefs -a /dev/sdd
wipefs -a /dev/sde
wipefs -a /dev/sdf
wipefs -a /dev/sdg
wipefs -a /dev/sdh
wipefs -a /dev/sdi
**END of NOTE
dd if=/dev/zero of=/dev/sdb bs=1024 count=1024
dd if=/dev/zero of=/dev/sdc bs=1024 count=1024
dd if=/dev/zero of=/dev/sdd bs=1024 count=1024
dd if=/dev/zero of=/dev/sde bs=1024 count=1024
dd if=/dev/zero of=/dev/sdf bs=1024 count=1024
dd if=/dev/zero of=/dev/sdg bs=1024 count=1024
dd if=/dev/zero of=/dev/sdh bs=1024 count=1024
dd if=/dev/zero of=/dev/sdi bs=1024 count=1024
reboot
ls -lsa /dev/sd*
0 brw-rw---- 1 root disk 8, 0 Aug 6 19:26 /dev/sda
0 brw-rw---- 1 root disk 8, 1 Aug 6 19:26 /dev/sda1
0 brw-rw---- 1 root disk 8, 2 Aug 6 19:26 /dev/sda2
0 brw-rw---- 1 root disk 8, 3 Aug 6 19:26 /dev/sda3
0 brw-rw---- 1 root disk 8, 16 Aug 6 19:26 /dev/sdb
0 brw-rw---- 1 root disk 8, 32 Aug 6 19:26 /dev/sdc
0 brw-rw---- 1 root disk 8, 48 Aug 6 19:26 /dev/sdd
0 brw-rw---- 1 root disk 8, 64 Aug 6 19:26 /dev/sde
0 brw-rw---- 1 root disk 8, 80 Aug 6 19:26 /dev/sdf
0 brw-rw---- 1 root disk 8, 96 Aug 6 19:26 /dev/sdg
0 brw-rw---- 1 root disk 8, 112 Aug 6 19:26 /dev/sdh
0 brw-rw---- 1 root disk 8, 128 Aug 6 19:26 /dev/sdi
fdisk -l should show non partion drives for sdb through sdi
Installing mdadm
yum clean all && yum update
Verify Attached Drives
ls -l /dev | grep sd
mdadm --examine /dev/sd[b-i]
Creating Partitions for RAID. Do this for all 8 drives
parted /dev/sdb
mklabel gpt
yes
unit TB
mkpart primary 0.00TB 3.00TB
quit
[root@nas ~]# ls -lsa /dev/sd*
0 brw-rw---- 1 root disk 8, 0 Aug 6 19:26 /dev/sda
0 brw-rw---- 1 root disk 8, 1 Aug 6 19:26 /dev/sda1
0 brw-rw---- 1 root disk 8, 2 Aug 6 19:26 /dev/sda2
0 brw-rw---- 1 root disk 8, 3 Aug 6 19:26 /dev/sda3
0 brw-rw---- 1 root disk 8, 16 Aug 6 19:35 /dev/sdb
0 brw-rw---- 1 root disk 8, 17 Aug 6 19:35 /dev/sdb1
0 brw-rw---- 1 root disk 8, 32 Aug 6 19:36 /dev/sdc
0 brw-rw---- 1 root disk 8, 33 Aug 6 19:36 /dev/sdc1
0 brw-rw---- 1 root disk 8, 48 Aug 6 19:37 /dev/sdd
0 brw-rw---- 1 root disk 8, 49 Aug 6 19:37 /dev/sdd1
0 brw-rw---- 1 root disk 8, 64 Aug 6 19:37 /dev/sde
0 brw-rw---- 1 root disk 8, 65 Aug 6 19:37 /dev/sde1
0 brw-rw---- 1 root disk 8, 80 Aug 6 19:37 /dev/sdf
0 brw-rw---- 1 root disk 8, 81 Aug 6 19:37 /dev/sdf1
0 brw-rw---- 1 root disk 8, 96 Aug 6 19:37 /dev/sdg
0 brw-rw---- 1 root disk 8, 97 Aug 6 19:37 /dev/sdg1
0 brw-rw---- 1 root disk 8, 112 Aug 6 19:37 /dev/sdh
0 brw-rw---- 1 root disk 8, 113 Aug 6 19:37 /dev/sdh1
0 brw-rw---- 1 root disk 8, 128 Aug 6 19:37 /dev/sdi
0 brw-rw---- 1 root disk 8, 129 Aug 6 19:37 /dev/sdi1
Exzamine drives
mdadm --examine /dev/sd[b-i]
mdadm --examine /dev/sd[b-i]1
Creating RAID array
mdadm --create /dev/md0 --level raid10 --raid-disks 8 /dev/sd[b-i]1
****NOTE use "--level=stripe" for raid0
Exzamine Array
cat /proc/mdstat
mdadm -E /dev/sd[b-i]1
mdadm --detail /dev/md0
Create file system
mkfs.ext4 /dev/md0
Mount Array
mkdir /myraid
mount /dev/md0 /myraid
Persistent mount on reboot
vi /etc/fstab
/dev/md0 /myraid ext4 defaults 0 0
Check for fstab errors
mount -av
Saving RAID Configuration
mdadm -E -s -v >> /etc/mdadm.conf
mdadm --detail --scan --verbose >> /etc/mdadm.conf
cat /etc/mdadm.conf
Friday, August 5, 2016
Increase A VMware Disk Size (VMDK) Formatted As Linux LVM without rebooting
Stole this from https://ma.ttias.be/increase-a-vmware-disk-size-vmdk-formatted-as-linux-lvm-without-rebooting/
Increase A VMware Disk Size (VMDK) Formatted As Linux
LVM without rebooting
Mattias Geniar, Friday, August 27,
2010 - last modified: Sunday, July 24, 2016
To increase the size of your VMware
Virtual Machine, you need to do 2 major steps. First, you need to increase
the disk's size in your vSphere Client or through the CLI. This will
increase the "hardware" disk that your Virtual Machine can see. Then,
you need to utilize that extra space by partitioning it. If you're
interested in just resizing your Linux LVM, please proceed to step 2.
In this example, I'm increasing a
3GB disk to a 10GB disk (so you can follow using the examples).
I would advise you to read the
excellent documention on Logical
Volume Management on tldp.org.
Just a small note beforehand; if
your server supports hot adding new disks, you can just as easily add a new
Hard Disk to your Virtual Machine. You can increase the LVM volume without
rebooting your Virtual Machine by rescanning the SCSI bus, more on that later
in this article.
1)
Checking if you can extend the current disk or need to add a new one
This is rather important step,
because a disk that has been partitioned in 4 primary partitions already can
not be extended any more. To check this, log into your server and run fdisk
-l at the command line.
#
fdisk -l
Disk
/dev/sda: 187.9 GB, 187904819200 bytes
255
heads, 63 sectors/track, 22844 cylinders
Units
= cylinders of 16065 * 512 = 8225280 bytes
Device
Boot
Start
End Blocks Id System
/dev/sda1
*
1
25 200781 83 Linux
/dev/sda2
26 2636
20972857+ 8e Linux LVM
If it looks like that, with only 2
partitions, you can safely extend the current hard disk in the Virtual Machine.
However, if it looks like this:
~#
fdisk -l
Disk
/dev/sda: 187.9 GB, 187904819200 bytes
255
heads, 63 sectors/track, 22844 cylinders
Units
= cylinders of 16065 * 512 = 8225280 bytes
Device
Boot
Start
End Blocks Id System
/dev/sda1
*
1 25
200781 83 Linux
/dev/sda2
26 2636
20972857+ 8e Linux LVM
/dev/sda3
2637 19581 136110712+
8e Linux LVM
/dev/sda4
19582 22844
26210047+ 8e Linux LVM
It will show you that there are already
4 primary partitions on the system, and you need to add a new Virtual Disk to
your Virtual Machine. You can still use that extra Virtual Disk to increase
your LVM size, so don't worry.
2)
The "hardware" part, "physically" adding diskspace to your
VM
Increasing the disk size can be done
via the vSphere Client, by editing the settings of the VM (right click >
Settings).
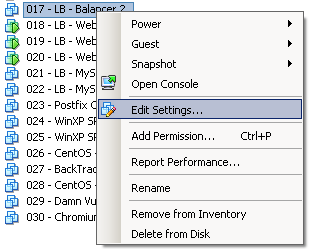
Edit settings
Now, depending on the first step, if
there aren't four primary partitions yet, you can increasing the privisioned
disk space.
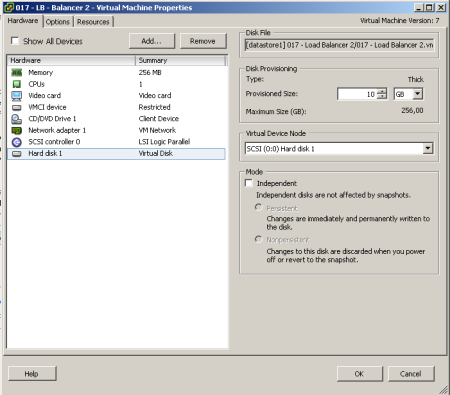
Increase disk size
If the "Provisioned Size"
area (top right corner) is greyed out, consider turning off the VM first (if it
does not allow "hot adding" of disks/sizes), and check if you have
any snapshots made of that VM. You can not increase the disk size, as long as
there are available snapshots.
Alternatively, if you already
have 4 primary paritions, you can also choose "Add..." to
add new Hardware "Virtual Disk" to your VM, with the desired extra
space.
3)
Partitioning the unallocated space: if you've increased the disk size
Once you've changed the disk's size
in VMware, boot up your VM again if you had to shut it down to increase the
disk size in vSphere. If you've rebooted the server, you won't have to rescan
your SCSI devices as that happens on boot. If you did not reboot your server,
rescan your SCSI devices as such.
First, check the name(s) of your
scsi devices.
$
ls /sys/class/scsi_device/
0:0:0:0
1:0:0:0 2:0:0:0
Then rescan the scsi bus. Below you
can replace the '0\:0\:0\:0' with the actual scsi bus name found with the
previous command. Each colon is prefixed with a slash, which is what makes it
look weird.
~$
echo 1 > /sys/class/scsi_device/0\:0\:0\:0/device/rescan
That will rescan the current scsi
bus and the disk size that has changed will show up.
3)
Partitioning the unalloced space: if you've added a new disk
If you've added a new disk on the
server, the actions are similar to those described above. But instead of
rescanning an already existing scsi bus like show earlier, you have to rescan
the host to detect the new scsi bus as you've added a new disk.
$
ls /sys/class/scsi_host/
total
0
drwxr-xr-x 3 root root 0 Feb 13 02:55 .
drwxr-xr-x
39 root root 0 Feb 13 02:57 ..
drwxr-xr-x 2 root root 0 Feb 13 02:57 host0
Your host device is called 'host0',
rescan it as such:
$
echo "- - -" > /sys/class/scsi_host/host0/scan
It won't show any output, but
running 'fdisk -l' will show the new disk.
Create
the new partition
Once the rescan is done (should only
take a few seconds), you can check if the extra space can be seen on the disk.
~$ fdisk -l
Disk
/dev/sda: 10.7 GB, 10737418240 bytes
255
heads, 63 sectors/track, 1305 cylinders
Units
= cylinders of 16065 * 512 = 8225280 bytes
Device
Boot
Start
End Blocks Id System
/dev/sda1
*
1
13 104391 83 Linux
/dev/sda2
14 391
3036285 8e Linux LVM
So the server can now see the 10GB
hard disk. Let's create a partition, by start fdisk for the /dev/sda device.
~$ fdisk /dev/sda
The
number of cylinders for this disk is set to 1305.
There
is nothing wrong with that, but this is larger than 1024,
and
could in certain setups cause problems with:
1)
software that runs at boot time (e.g., old versions of LILO)
2)
booting and partitioning software from other OSs
(e.g.,
DOS FDISK, OS/2 FDISK)
Command
(m for help): n
Now enter 'n', to create a new
partition.
Command
action
e
extended
p
primary partition (1-4)
p
Now choose "p" to
create a new primary partition. Please note, your system can only have 4
primary partitions on this disk! If you've already reached this limit, create
an extended partition.
Partition
number (1-4): 3
Choose your partition number. Since
I already had /dev/sda1 and /dev/sda2, the logical number would
be 3.
First
cylinder (392-1305, default 392): <enter>
Using
default value 392
Last
cylinder or +size or +sizeM or +sizeK (392-1305, default 1305): <enter>
Using
default value 1305
Note; the cylinder values will vary
on your system. It should be safe to just hint enter, as fdisk will give you a
default value for the first and last cylinder (and for this, it will use the
newly added diskspace).
Command
(m for help): t
Partition
number (1-4): 3
Hex
code (type L to list codes): 8e
Changed
system type of partition 3 to 8e (Linux LVM)
Now type t to change the
partition type. When prompted, enter the number of the partition you've just
created in the previous steps. When you're asked to enter the "Hex
code", enter 8e, and confirm by hitting enter.
Command
(m for help): w
Once you get back to the main
command within fdisk, type w to write your partitions to the disk.
You'll get a message about the kernel still using the old partition table, and
to reboot to use the new table. The reboot is not needed as you can also rescan
for those partitions using partprobe. Run the following to scan for the
newly created partition.
~$
partprobe -s
If that does not work for you, you
can try to use "partx" to rescan the device and add the new
partitions. In the command below, change /dev/sda to the disk on which you've
just added a new partition.
~$
partx -v -a /dev/sda
If that still does not show you the
newly created partition for you to use, you have to reboot the server.
Afterwards, you can see the newly created partition with fdisk.
~$ fdisk -l
Disk
/dev/sda: 10.7 GB, 10737418240 bytes
255
heads, 63 sectors/track, 1305 cylinders
Units
= cylinders of 16065 * 512 = 8225280 bytes
Device
Boot
Start
End Blocks Id System
/dev/sda1
*
1
13 104391 83 Linux
/dev/sda2
14 391
3036285 8e Linux LVM
/dev/sda3
392 1305
7341705 8e Linux LVM
3)
Extend your Logical Volume with the new partition
Now, create the physical volume as a
basis for your LVM. Please replace /dev/sda3 with the newly created
partition.
~$ pvcreate /dev/sda3
Physical
volume "/dev/sda3" successfully created
Now find out how your Volume Group
is called.
~$ vgdisplay
---
Volume group ---
VG
Name
VolGroup00
...
Let's extend that Volume Group by
adding the newly created physical volume to it.
~$ vgextend VolGroup00 /dev/sda3
Volume
group "VolGroup00" successfully extended
With pvscan, we can see our newly
added physical volume, and the usable space (7GB in this case).
~$ pvscan
PV
/dev/sda2 VG VolGroup00 lvm2 [2.88 GB /
0 free]
PV
/dev/sda3 VG VolGroup00 lvm2 [7.00 GB / 7.00 GB
free]
Total:
2 [9.88 GB] / in use: 2 [9.88 GB] / in no VG: 0 [0 ]
Now we can extend Logical Volume (as
opposed to the Physical Volume we added to the group earlier). The command is
"lvextend /dev/VolGroupxx /dev/sdXX".
~$ lvextend /dev/VolGroup00/LogVol00 /dev/sda3
Extending
logical volume LogVol00 to 9.38 GB
Logical
volume LogVol00 successfully resized
If you're running this on Ubuntu,
use the following.
~$ lvextend /dev/mapper/vg-name /dev/sda3
All that remains now, it to resize
the file system to the volume group, so we can use the space. Replace the path
to the correct /dev device if you're on ubuntu/debian like systems.
If you got an error like this, it
may mean your filesystem is XFS instead of standard ext2/ext3.
$
resize2fs /dev/mapper/centos_sql01-root
resize2fs
1.42.9 (28-Dec-2013)
resize2fs:
Bad magic number in super-block while trying to open
/dev/mapper/centos_sql01-root
Couldn't
find valid filesystem superblock.
For xfs file system
use
$ xfs_growfs /
In that case, you'll need to
increase the XFS partition. Read here for more details: Increase/Expand an XFS Filesystem in RHEL 7 / CentOS 7.
And we're good to go!
~$ df -h
Filesystem
Size Used Avail Use% Mounted on
/dev/mapper/VolGroup00-LogVol00
9.1G 1.8G 6.9G 21% /
/dev/sda1
99M 18M 77M 19% /boot
tmpfs
125M 0 125M 0% /dev/shm
Subscribe to:
Posts (Atom)